You know that meme of the skeleton at the bottom of the sea? I know that’s some of y’all, waiting for an update on our basement renos. As the old lady said, it has been 84 years … in this case, since we started that project. And about 82.5 years since the project achieved 90% completion. But today is not the day that I announce that particular wait to be over. In the circumstances, it might seem strange that I should be talking about a different home DIY project today, but trust me – it’s very on-brand for us. Or, I should say, for my husband; he loves to start things, hates the finicky finishing work, and also refuses to lower his standards for finishing work. He assures me that he is not alone, hence why, in construction, “substantial completion” occurs when the work is 90% done. I am not really in a position to challenge him, seeing as how he does most of the work.
Anywaaaaay.
New project.
This had been on our radar for some time, but the timing was sort of forced on us. I’ll come back to that later. To start at the beginning: back in early 2020, like most people, I scrambled to put together a working space for myself when, unexpectedly, I had to pivot to WFH. This space ended up being set up in my bedroom, where my husband hastily hacked together some IKEA pieces to create a table that could be set up next to my existing vanity. It was not a proper desk by any stretch of the imagination (it had no drawers and I had to use the very shallow one in my vanity to store pens, paper, etc.), but it provided me the bare necessities. Four years later, I am still 100% WFH and figured it was time to create a better office set-up – something that would accommodate my working needs, and also look nicer as part of the bedroom.
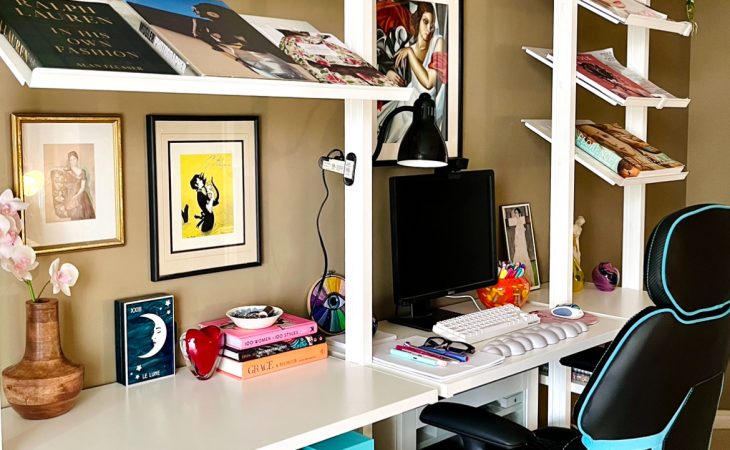
Of course, I don’t have a proper “before” photo of the old space, but here’s a shot of the gallery wall above my desk; you can see the top of the vanity to the left, and the shelf that we added above my desk. (The computer monitor is blocked out.)
The original inspiration for our project was the mid-century modern modular wall units that my husband and I both love:
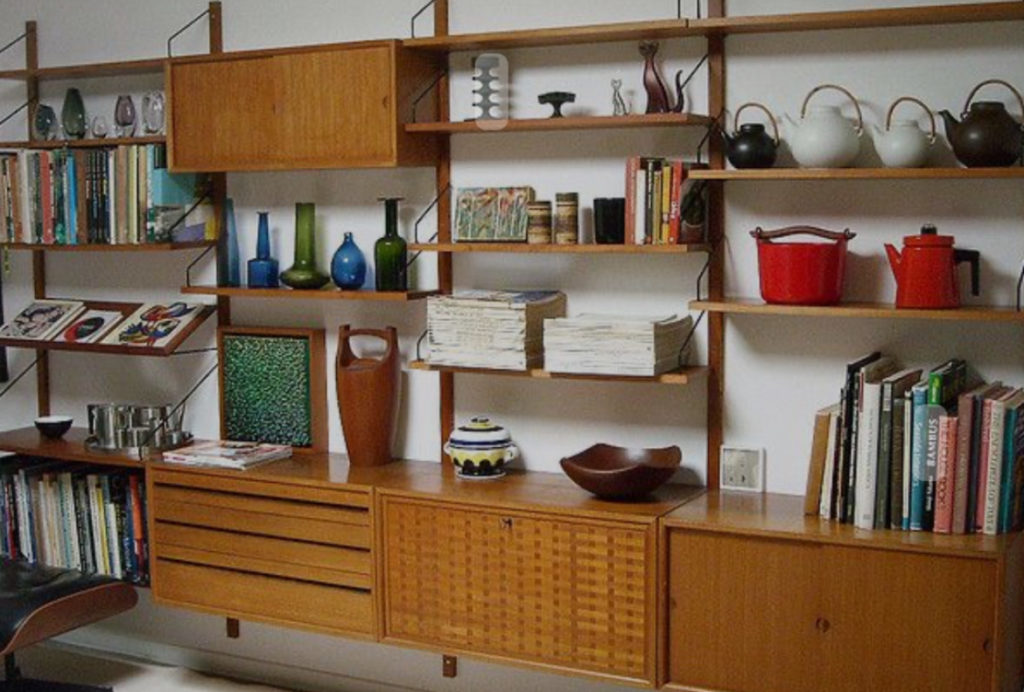
Some of them came with a little desk area; alternatively, we thought one could be hacked to add a desk. The problem is that these units are (a) hard to find, and (b) hella expensive. Forget the original Danish versions; even a repro can run to multiple thousands for the wall span we are dealing with, and customization would be limited. My husband’s first idea was to try to build one himself, from scratch, based on our own design. The material would still cost a fair bit, but we would be able to fully customize and also save on the labour. Because of the work involved, the project was back-burnered. Then, my husband had another idea: to create a contemporary equivalent using pre-made IKEA pieces. It always comes back to an IKEA hack for us. The convenience is hard to beat. He had his eye on the Elvarli wardrobe system, which had the most potential. Indeed, I have seen photos where it’s been used by professional interior designers to create living room wall units and room dividers – it’s more versatile than its official classification would suggest (which, frankly, is true of most IKEA pieces). Still, the project remained a secondary priority because we had other stuff on the go, not least of all the basement.
But then life made other plans for us. The Elvarli system went on major sale at IKEA. My husband has learned the lesson of never letting a good sale pass – you never know if it will happen again and, with inflation these days, it’s never guaranteed to be as good in the future. So, we went and bought everything … and because we have nowhere to store extra construction material, we had to build it, too.
I am using the royal “we”, of course. I did help, though. Holding up poles, passing tools, and providing sparkling conversation.
Unlike most of our projects, this one was actually 100% completed … in under a week, no less. The construction itself took about a day, with a bit of extra install on a second day after we changed the design part-way through. The prep actually took longer, because we not only had to move all of the existing furniture out of the way, we also have that massive gallery wall to take down and patch up. This particular wall has actually seen a series of galleries over the 14 years we’ve been living in this house, so there were about a bazillion holes of different sizes to fix and paint over. That took quite a few hours, spread over about 3 or 4 days. Once the space was ready, the unit went up relatively quickly though it was a bigger pain-in-the-you-know-what than other IKEA systems we’ve used in the past. My husband complained that the assembly instructions were incredibly poor, so he had to figure out most of the work himself. Working with a popcorn ceiling was not easy either – the poles that hold up the unit have to be screwed into the ceiling. Anyway, once those were up, the rest was quite easy.
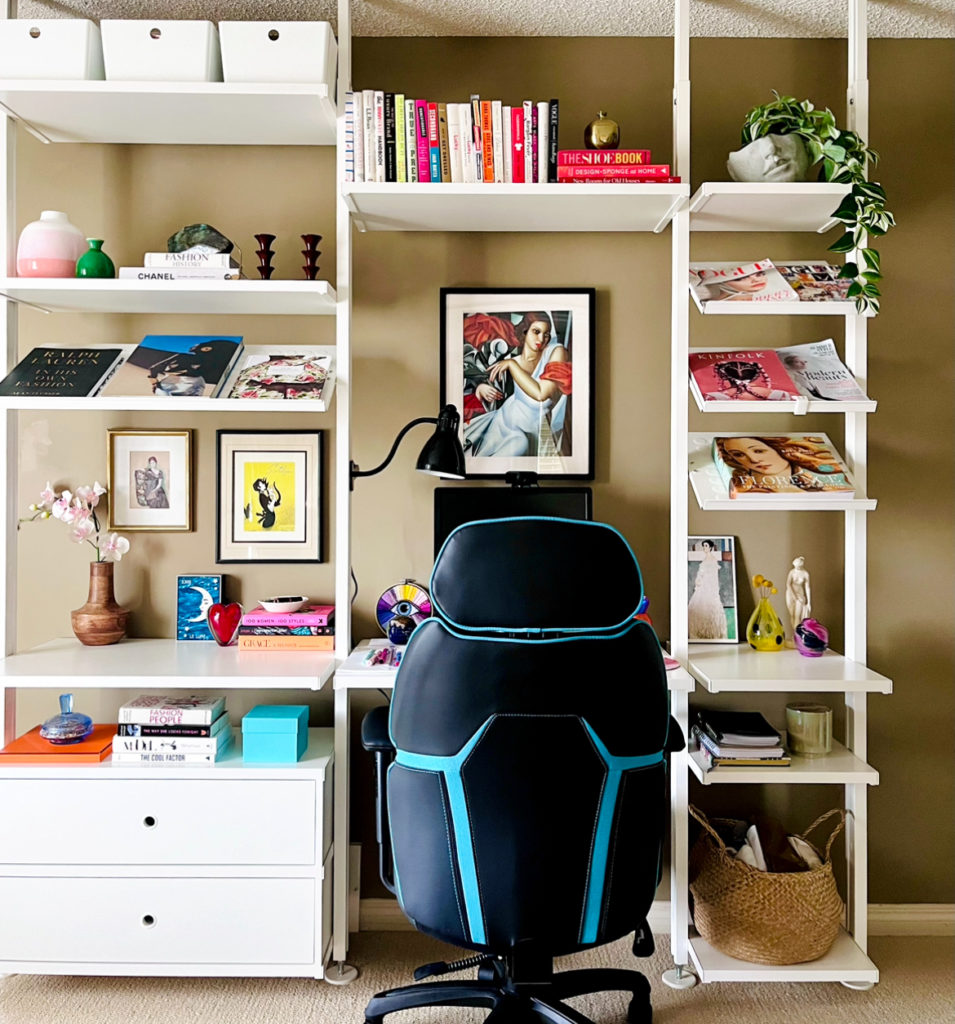
For anyone interesting in the practical details, we used 4 poles to create 3 bays: 2 large ones and a smaller one. We used the deep version of the Elvarli system shelf to create a desk/work surface that effectively extends across all 3 bays, albeit with small gaps in between (due to the poles). This shelf is 20 inches deep and about 32 inches wide (on a large bay), which is sufficient for my pretty minimalist work set-up. I may end up getting a new computer monitor with a slimmer profile, which would free up a bit more desktop space. We decided to use the shallower shelves everywhere else, above and below the “desk”, which resulted in a recessed design that looks nicely balanced. We had originally bought deep shelves for the upper part of the unit, but after installing the first one, changed our minds; it felt too much like an overhanging canopy. The shallower shelves are still fairly wide (14 inches) so they provide plenty of storage room. I also like how they looked on the bottom part of the unit, sort of tucked back under the desk. Again, we were initially going to install the deep drawers on the bottom left bay, but they were out of stock; after we saw how nice the shallower shelves looked on the bottom right bay, we decided to switch to the shallower drawers instead — and they were in stock! All in all, we used 10 shelves, 2 drawers, and 4 shoe racks. The shoe racks are my favourite! I have seen similar slanted shelves used in wall units to display books, and I knew I wanted to incorporate that element into my version.
This configuration has massively increased the available storage space. In fact, I was able to do a little reorg of another storage unit in the bedroom and better organize a variety of things, including some clothes, craft stuff, office stuff, and other personal items. The highest shelf on the wall unit, which isn’t the most accessible, is now storage for all my sentimental paperwork — birthday cards, letters, old diaries, etc. Moving all that stuff there had a domino effect of clearing out space elsewhere. I’m very pleased to have found those white bins (also IKEA) that match the design of the drawers below. It makes everything look cohesive.
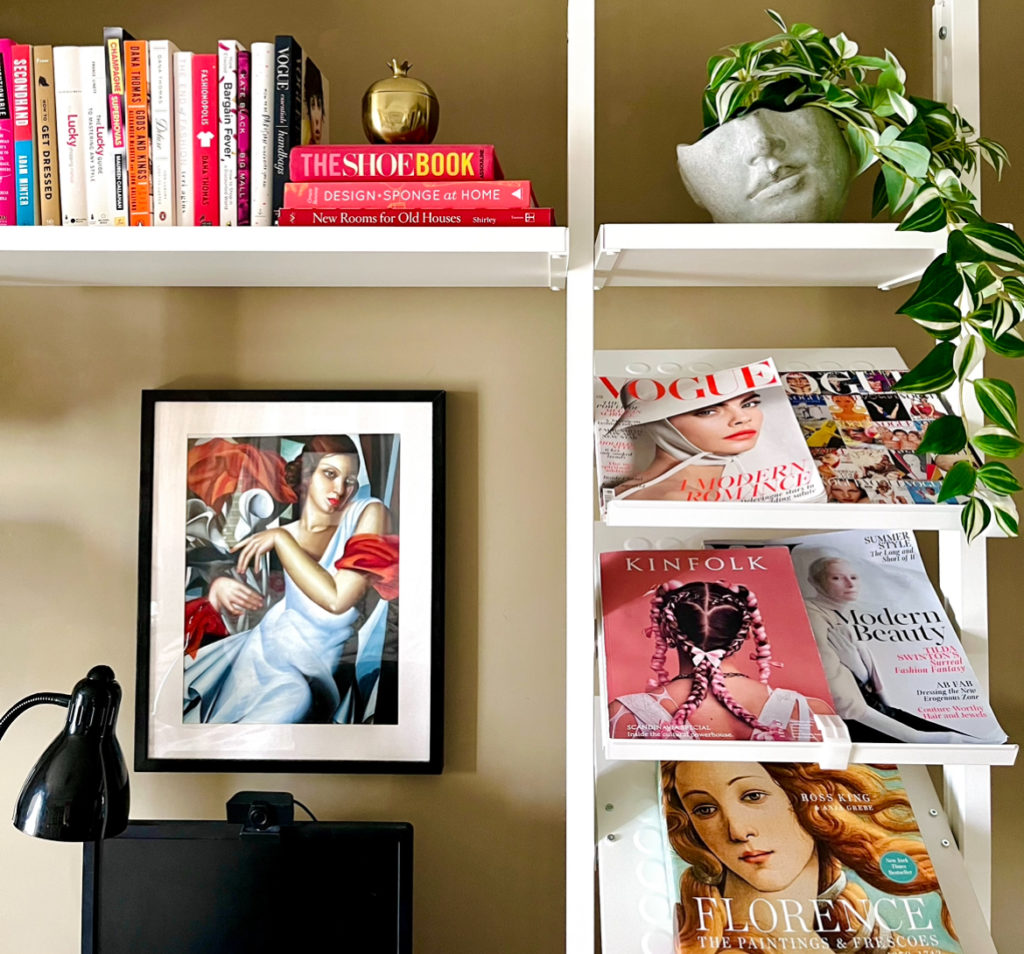
My main job, as always, was to style the shelves. I think I did pretty well.
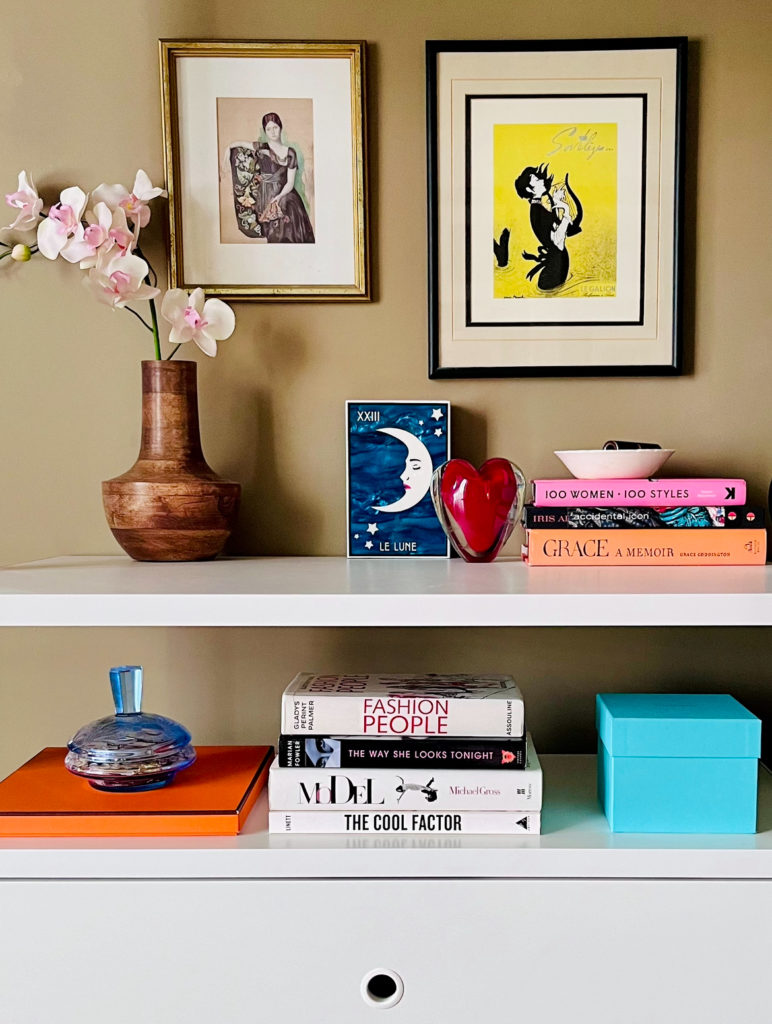

I reused objects from different parts of the house, which meant rearranging those spaces too. I love doing that – it’s a way to refresh the look of the house and display loved objects in new ways. My old vanity went to my daughter, who got a room refresh of her own this way. Filling the slanted shelves with fashion coffee table books and magazines inspired me to make that a kind of theme for my decorating, so I pulled most of my fashion books from the main library and created a specialty mini library here. As a bonus, that freed up space in the main library, where it was badly needed. The only sacrifice was my picture gallery; there is simply not enough room for all the pictures that used to hang on this wall. I was able to move most of them to other parts of the house, but some had to go into storage for the time being. They may see another day in the spotlight in a future refresh.
Overall, this was a most satisfying DIY – relatively quick, maximum impact. All told, the Elvarli unit cost just under $1,000 in materials and required no actual hacking, only assembly. I also splurged on a new chair, to match the height of the desk and upgrade my comfort level, but it was under $150 (on sale) at Costco. It doesn’t really fit the aesthetic, but for the time being, practical realities take precedence; in the future, when I don’t have to spend as much time working at this desk, I’ll switch it out for something a bit more elegant. For now, this work space is everything I asked for and more!

Like this:
Loading…


![13 Best Sites to Stream UFC Live Online for Free [2024] 13 Best Sites to Stream UFC Live Online for Free [2024]](https://appearworld.com/wp-content/uploads/2024/11/13-Best-Sites-to-Stream-UFC-Live-Online-for-Free-200x125.jpg)


